Question On Order Of Operations
Good morning Dronelink Community,
I hope this is a simple question on the order of operations in a mission. I have the following mision planned
My intention with this plan is to launch -> Fly to WayPoint 'A' {Focus on POI-'A'}, -> descend to 55 ft (Path Action 1), -> Start recording, -> WAIT 3 sec, -> then fly backwards while ascending to 250, -> WAIT 3 sec, -> Stop recording, ->fly home. Essentially what I am trying to create is a 'Dronie' shot of a new building.
The 'WAIT 3 sec' at the end of the plan is working as expected. But the 'WAIT 3 Sec at the beginning doesn't seem to be happening. When I step through the plan in the mission preview with the WAIT 3 sec at path action 1 The counter seems to be counting down while the drone is descending to 55 ft and starting the recording. I am curious if a WAIT can be used at the beginning of a path?
OR
Should I redo the path that is in the list and add a 'Hover' (breaking this up into 2 different paths in the list) and keep the automatic capture on the list instead of the path?
Comments
12 comments
Hi Kevin, I only see 5 second pause at the end of the mission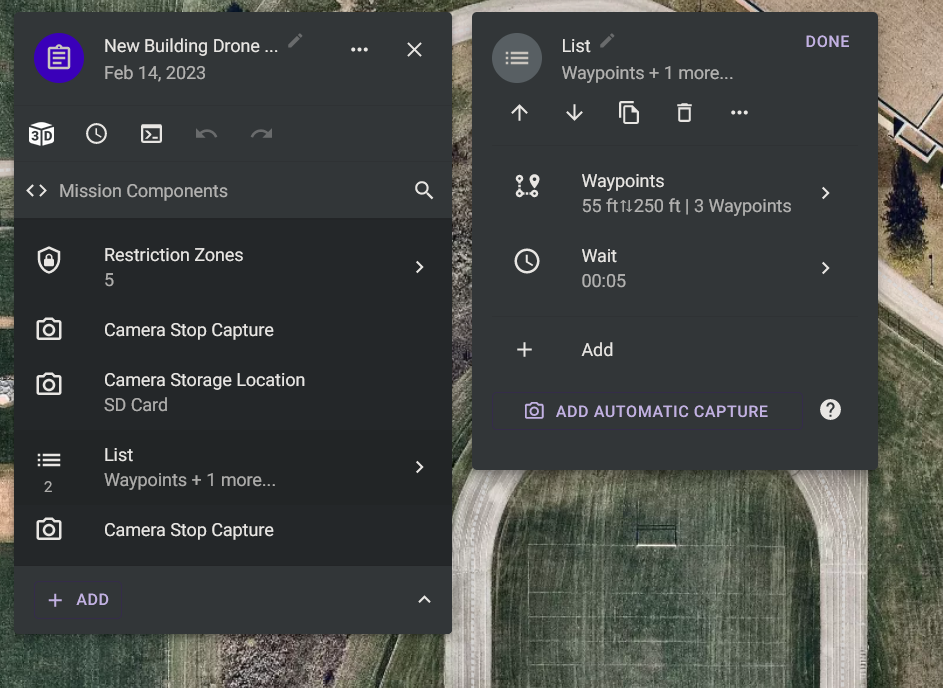
If it might be of use to you I've created a Dronie component https://app.dronelink.com/martin-reading/my-components/component/5TGTdRu2kSEtbmhKF4ep
Hi Martin,
Thank you for for your time and quick response. yes. The 'wait' at waypoint 'A' I removed because it wasn't working. I just left the ending wait command. I will have a look a the component above and give it a fly. Thank you.
I’ve noticed when running the mission preview with a marker using a wait command they don’t reflect that wait time. Not sure why but I’ve flown a good amount of missions with a marker set with a wait command on a path and it works when actually flying the mission. The end of the path wait time is indicated because it’s a command after the end of the path so it’s waiting for the amount of time to elapse before ending the mission. Again, not sure why markers don’t but it’s been like this for a long time. Maybe Jim or a DL staff member can explain why. I’d copy the plan and then move it to a location somewhere near you where you can quickly test and see if it does work. I believe it will. Good luck.
Martin. That link isn’t working so may try again. 👍🏼
Cheers Mike, link now updated to public repository
The Wait component does not affect the motion of the drone. Wait is an advanced component that is intended to be used as a delay between commands if you find that issuing too many commands too quickly fails on your drone / camera for some specific combination of commands / settings. If you want the drone to come to a complete stop, you use Hover, which is why that is the primary option that is showing when you click a waypoint or marker (because when most people think about the drone waiting, what they mean in DL lingo is Hover). Having said that, if you are trying to accomplish a series of tasks through waypoints, and then want to stop and do things, the recommended approach is to break up the Waypoint component into two components, and the system actually does this for you if you choose the Hover option. We may just rename the Wait component to Delay so that it causes less confusion.
Good evening Jim, Thanks for your time and quick response. I'm not having trouble with commands failing, it's actually the opposite. The commands are executing too quickly that is why I am using the Wait command. I have tried the 'Hover' command but 99% of the time the DroneLink 'Hover command breaks my plan and my video so I just don't use it. When I think of a 'Hover' that is a 'Hands Off the sticks' and let the drone hang in the air. When I try to use the 'Hover' command in DroneLink at a marker on a path the path is broken and a new path is created plus the video is stopped and a new one created. When I have the drone on a path between waypoints 'A' & 'B' and I use a 'Hover' on a marker between those 2 points I would expect the drone to stop and 'Hover' for x seconds then continue to the next waypoint uninterrupted. With the plan I mentioned above what I am trying to accomplish is fly to waypoint 'A' at 100ft then descent to 55ft at path action 1 start the video 'Hover' for 3 seconds then begin the flight straight back while ascending to 250 ft (waypoint 'C') Once the reaches its destination keep the video going for another 3 seconds, mission complete, return home. I like to have the extra time in the videos's because it makes post editing easier with transitions, titles, and clipping in with other videos.
Kgaudineer, to avoid this happening, don't use auto capture, but insert your record video component at the start of the mission before the list component, rather than at Path action 1, see modified mission on link below
https://app.dronelink.com/martin-reading/public-test/plan/227kGGXeNGqFxNQzC9XQ
Dronelink does not have the ability to stop at a waypoint or marker and keep going later in the same waypoint component, and this is by design. If you want to stop, you need to terminate the component and create another one after it (this is why it automatically splits your component when you add a Hover). If you really want to use automatic capture, you can just put all your waypoint components into a list, and then enable automatic capture on the containing list instead.
Jim Good Morning, Fantastic response that explanation cleared a lot of confusion for me. I had to read through it a couple of times but thank you so much for the help. Additionally a shout out to Martin Reading for his video capture suggestion. I was able to modify my mission plan so now it looks like this. After stepping through the mission in mission preview it runs precisely how I want it to run.
https://app.dronelink.com/kevin-gaudineer/valley-southwoods/plan/MLbxqhREQFMPxa2JHTlX/M2B3OYZ8a9v7j0jYiptZ
Since your first waypoint component is only one waypoint, you might consider just using a checkpoint instead.
A lot of different ways to set up a plan to get the desired look. The pilots knowledge of the app, actual testing of different missions over time will eventually enable each pilot to figure out what works best for them. I’d suggest creating many simple short plans which can be flown anywhere which can test different functions to see how they actually work in the real world. When I first started over two years ago I created a ton of mock plans just to see how they looked in mission preview and then actually ran a lot of them. I learned a lot by testing functions with the plans and running them in the real world. The more you use the Web app the quicker you can set up a 10 to 20 minute mission. Also if you have ability to export to Google Earth you can run the mission and get a much better look at what the mission will look like beforehand. The extra time pays off. Good luck and enjoy.
Please sign in to leave a comment.