In order to make the filming more seamless, I need to adjust every markers parameters...
In order to make the filming more seamless, I need to adjust every marker's parameters...
I hope to know how to display the aircraft orientation in the planning screen?
I know there is a simulator but it requires too much effort and wastes time.
I am an elite user and I need the planning to be smarter and quicker.
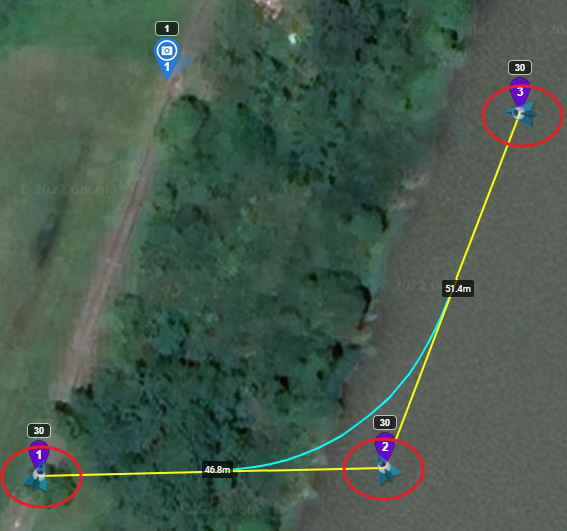
I hope to know how to make the simulator just displays on every marker like as shown in the pic2.
The aircraft's orientation and the height on every maker is a MUST. I have to adjust every single marker's gimbal and drone heading parameters to achieve the filming result, and currently, it really takes too much time to do it with the simulator.
Currently, it really takes too much time to do it.
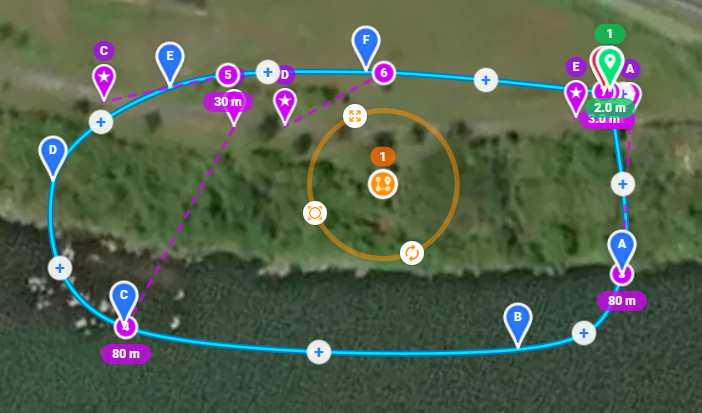
Pic 1: One of my most simple missions
Pic 2: I hope to know how to display the simulator on every single marker.
Comments
16 comments
Not possible right now. Moving this to feature requests.
I assuming you mean the mission previewer? If you don't like that feature for some reason (many people buy Dronelink solely because of this feature), have you tried adding markers (heading and gimbal pitch) with the simulated drone (see example)?
Would you mind sharing your mission plan in case there are some other recommendations I could make on how to use the existing tools and features to accomplish your desired result in less steps?
Hi Jim
I don't know how other people do planning.
However, I have a very fast way to build my flight plans.
I only focus on 3+1 paramters:
1. Height
2. Heading
3. Gimbal pitch
4. Speed
I will fine-tune these parameters very carefully to get the expected result.
Among these parameters, the calculation of Pitch is the most difficult one, it is about the trigonometric function with multiple parameters.
Setting marker's POI is the main solution to set the gimbal's pitch. It automatically calculates the gimbal pitch angle.
However, when I start the fine-tuning process, that means I change the marker's parameter from POI to Gimbal orientation, the pitch is actually reset. I can't only use dronelink to help me calculate the pitch angel... I still need to do it with a spreadsheet. And, copy paste the numbers....
Can you imagine my working situation? (haha)
Now, I can't do the fine-tuning with dronelink.
About the icon of the aircraft, the reason is similar.
It is all about fine-tuning.
As to the heading angles - 270 and 280 are just two different numbers. 271 and 275 are also just two different numbers.
But if I can see the aircraft's icon and live heading when doing the plan, it is quite helpful.
They are not just different numbers now but I will be able to do better fine-tuning.
That's all about my trial experience with dronelink and I hope you can understand it in more detail now.
Of course, you are very welcome to access all my private plans.
If you need it, please let me know.
Did you watch the video I linked?
I had a quick glance at this video.
https://support.dronelink.com/hc/en-us/articles/4405583668755-Mission-Planning-Starting-with-a-Waypoint-Mission-Templatehttps://support.dronelink.com/hc/en-us/articles/1500007215742-On-the-Fly-Path-Waypoint-Mission
Is this the one you mean?
If this is the correct one, what part did I miss?
Of course, I did it.
But, it takes too much time...
Step1: use the simulator
Step2: Adjust its height and heading and...
Step3: COPY AND PASTE the numbers....
If "copy and paste" is the solution, I will use the spreadsheet to calculate the numbers.
It doesn't require you to copy and paste, it just does it all for you:
It seems the solution.
And, I will need the "+".
Here is the screenshot. I don't have it.
Does elite include the feature?
Apologies for the confusion, but there are 3 different features here, each with a slightly different purpose. You want the first one:
1. Simulated Drone - for quick access to 3D views during mission planning. Right click anywhere on the map during mission planning to reveal:
2. Mission Preview - for verifying that your mission plan as a whole is exactly what you want before you fly (including command timelines).
3. Simulator - for advanced use cases only. We added this as an option to allow users to monitor the same simulation that is behind the mission previewer, but in real-time, including the option to pause the mission so you can test what the resume behavior will be like from any given pause point.
Hi Jim
I do a quick trial.
It's right exactly what I really need.
Thank you very much.
Glad you like it - we would be grateful if you left a 5-star review in the App Store (iOS | Android)!
It deserves more than 5 stars, and I've just shared a few of my feelings about the app.
Ray Kao This video might help with the simulated drone feature - https://vimeo.com/522775447
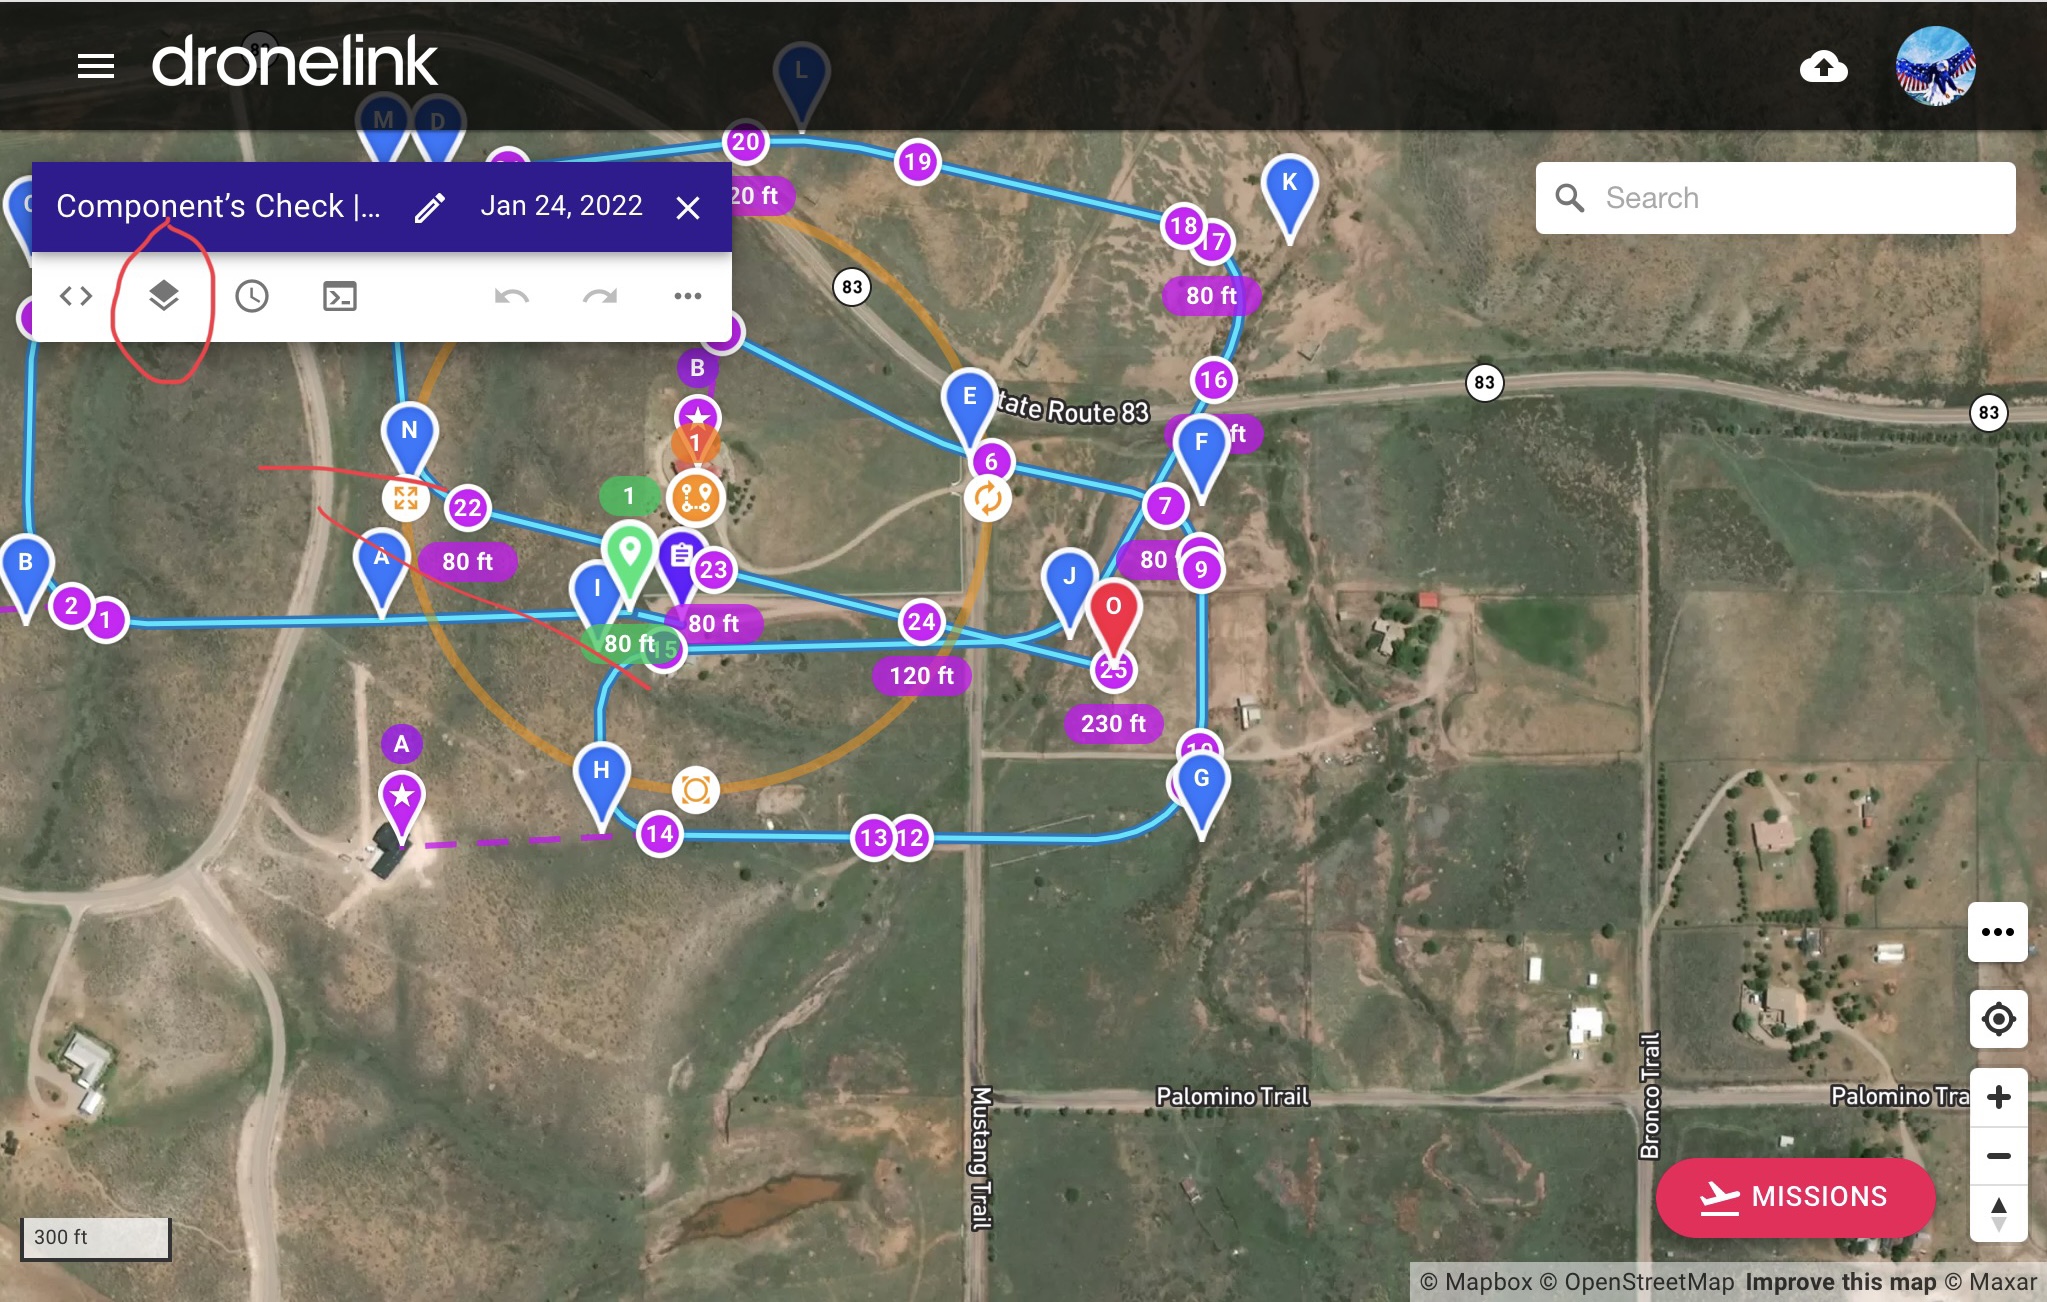
Your question about needing the “ + “, it’s in the layers. Click on the icon in top of bar and you can turn on or off any of those. This is just for adding additional path markers/ waypoints though.
Mike (Arizona Wyldwest)
Thank you for information. Now, I learn one more skill.
But, what Jim said is the other "+", it is a new quick way to do 3D flighting plans.
Barry Houldsworth
The video is informative. I am studying it.
Thank you very much.
Understood. Hopefully you got that other part figured out. Enjoy…
Please sign in to leave a comment.